Francisco Delgado, an art professor at UTEP, agreed to tackle a larger fresco, after painting a smaller test fresco. He falls into the Border Art movement, as the oil painting pictured below reveals -- called "$26," for Lincoln in the foreground, and Washington and Jackson driving smaller cars in the background:

First I cut a piece of Hardibacker cement board to about 23 x 30 inches:

Though a PacTool Snapper Shear SS524 might be much easier to cut with, I scored the board by hand (as recommended in this Cutting Cement Board video), on both sides, using a carbide tipped cutter -- BRUTUS 7-1/2 in. Backerboard Scoring Knife -- that I bought from Home Depot:

I cut the panel to fit in a drip pan, so that I could carry it around more easily:

1) SCRATCHCOAT (August 21)
I soaked the panel in distilled water over night, in a large garbage bag:

We cut a piece of fiberglass mesh to the size of the panel:


The recipe we are using calls for "pure white Portland cement" for the scratchcoat, but I just bought the Type 1 Portland Cement from Home Depot:

We mixed the first coat of plaster according to the recipe for the scratchcoat -- 1.5 parts Sand, 1 part Portland Cement, 1 part Lime Putty. We used the "20 grit" silica sand from New Mexico Plaster and Supply, and the quicklime I had slaked in Tucson in 2009:
We mixed the lime putty and sand together first, ultimately using 5 scoops of lime (24 ounce scoops) to 7.5 scoops of sand (ultimately we had plaster leftover). This plaster was fairly wet (without adding water):

We then added the 5 scoops of Portland Cement last, because it sets quickly. The Portland Cement made the mix too dry, so we had to add distilled water to make it spreadable:

Ready to plaster the scratchcoat:

Francisco first spread a thin coat of plaster onto the panel, and then covered it with the fiberglass mesh (inserted for added strength):
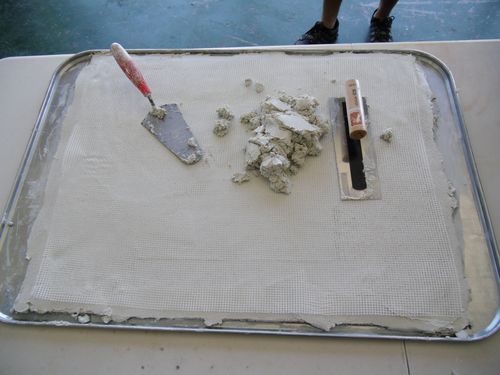
Plastering with force, over the fiberglass mesh, using the big stainless steel trowel:

Finally Francisco used a concrete tool to press horizontal groves into the plaster (he will be painting a landscape oriented image), so that the next coat of plaster will grab onto this scratchcoat:

Final scratchcoat:

We covered the scratchcoat entirely in plastic, and left it to dry. The next day the plaster had hardened completely, but it was very wet under the plastic. The second day the panel was still very moist, and I took the plastic off so that it could dry and carbonize:

Thickness of the scratchcoat (plus it weighs a lot):

I cut out a cardboard template of the exact size of the panel, so that Chris can weld an angle iron frame for the fresco:

2) BROWNCOAT (August 28)
Before plastering the browncoat, the 2nd coat, I soaked the whole panel again in distilled water, overnight. However, in the morning the water had receded, so that no water was sitting on the top:

The recipe for the browncoat calls for -- 2 parts sand to 1 part lime putty. We used the "30 grit" marble sand from American Clay, and the quicklime I had slaked in Tucson:

This time we used a power tool for mixing, testing it in the lime first, then adding sand gradually:

We used 4 scoops of lime putty to 8 scoops of sand (24 ounce scoops), and had plaster leftover. The power tool mixed the plaster nicely, into the consistency of tamale masa, still a little wet (we added no water at all):

All ready for plastering the browncoat, the 2nd coat:

Adding wet plaster onto the dried scratchcoat surface:

Pressing the plaster in with the big stainless steel trowel:

The scratchcoat was not even, so this time we used an aluminum floater to level the whole surface:

The flexible Japanese trowel from American Clay made smoothing the surface a lot easier:

We used a horse comb (a mane and tail comb) to rough up the surface in the end:

Lastly we covered the newly plastered panel with a plastic garbage bag, and set it aside to dry:

The next day (Aug 29) the browncoat had not dried at all. It was still very wet, and some of the plastic had settled, making our raked surface smooth in those parts, and uneven overall:

Therefore I took the plastic off, roughed up the smooth parts again, and put the panel in a small dark room to dry in the open air:

The following day (Aug 30) the plaster had dried and hardened somewhat -- but with big cracks. The door of the small room was left open, so a breeze might have accelerated the drying, which would certainly lead to cracks. Also temperatures in El Paso these days reach 100° F, and it was fairly dry.
I probably should have left the browncoat under plastic, like we did earlier in the summer in Lubbock, where the browncoat did not crack, in spite of the drought and a record heat wave. Better yet, I probably should have set the browncoat under a plastic tent, so that the plastic material would not rest on the fresh plaster and make the surface uneven, while it was drying:

Details of the big cracks in the browncoat:

3) BROWNCOAT REPAIR (Sept 5, Labor Day)
We had hoped to be painting this weekend, but there were too many cracks in the browncoat to move forward.
Thus we decided to rasp the cracks and fill them in with new plaster. I anticipated lots of problems, and bought too many rasps, files and chisels:

Part of the edges also dried too fast, and thus cracked and separated a bit from the scratchcoat below:

The short side of the plastered panel was just a bit thicker than a quarter:

The other side of the plastered fresco panel was way thicker than a quarter. Thus the surface was uneven:

Some of the deeper cracks:

The browncoat was still slightly damp -- and therefore soft -- a week after plastering. The fresco panel dried under plastic all week, except Tuesday (when the browncoat cracked):

Francisco easily gouged out the cracks with a small file tool, as the surface was as soft as crusty beach sand. Most of the cracks were not too deep:

Later Francisco widened the gouges with a bigger, rounded tool:

The surface after gouging out all the cracks:

We did not use Soapstone rasps to gouge out the cracks (I later found some at Hobby Lobby), but they might have worked best:

We sprayed the surface with distilled water serveral times, to moisten the surface before plastering:

We mixed a small batch of repair plaster -- 1 part lime putty, 2 parts "30 grit" marble sand, both from American Clay. This batch was not as wet at the original browncoat plaster last week:

Francisco patched the gouged holes with new plaster:

The repaired surface:

I covered the "repaired" browncoat panel in a plastic sheet, and left it to dry in my small storage space at the Glasbox studio:

I pulled the plastic off the panel 9 days later (September 14), and the patches had not set. They were not really wet, just sandy and weak.

Detail -- middle right patch looks sandy, and has not hardened yet:

I put the panel under a "cardboard tent" (just a raised piece of cardboard that doesn't touch the panel), and covered the opens ends with towels, to let it continue to dry (September 16). I should have put this panel under the "cardboard tent" immediately after I plastered the browncoat, and covered that with a plastic sheet:

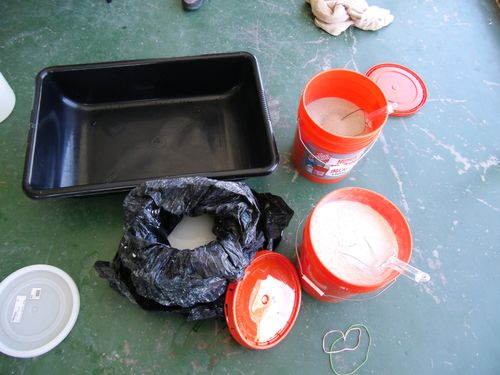
4) INTONACO (Sept 24)
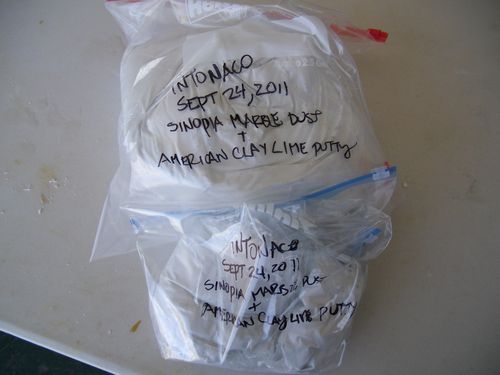
I mixed a bag of fresh intonaco in the morning -- 7 scoops (24 ounce scoops) of lime putty from American Clay, to 7 scoops of Marble Dust from Sinopia:

I mixed small batches with a stiff putty knife until the plaster was smooth, and put it in a Ziploc bag, before mixing the next small batch:

Lime eats skin. I should not handle the lime with my bare hands, but I do. Usually the lime just takes off a layer of skin, and my hands hurt slightly for the rest of the day. However, mixing the plaster by hand gives me blisters, and when the blisters pop and the lime eats into the wounds, it takes over a week, or more, to recover:

Hopefully this 2.5 gallon Ziploc bag, plus another gallon bag, will provide enough intonaco to plaster the 23 x 30 inch panel, and even replaster if the surface is scraped off:
The intonaco packed with other accessories -- lime water, extra Maya blue pigment, paper towels, plastic cover, and burlap (to be soaked and hung, to keep the air moist):

Panel, plastic roof, accessories, and distilled water (missing, bucket of extra lime putty), all ready to be taken to the car:

Francisco drove all these supplies to his house:

On Sunday (Sept 25) Francisco began painting. It was a cloudy day and 93°, not as hot as last month.
At 2:45 PM he started wetting down the panel outside:

He sprayed 4 large bottles of distilled water on the panel:
"I'm letting the water soak in for a few minutes (between bottles)."
"I'm looking for even saturation on the surface. I've done some spot spraying on matte areas. Always checking that the surface is not crumbling."

At 3:00 he moved the panel inside the studio, and let it soak for 20 minutes:

At 4:00 he started to apply the first coat of intonaco:

Intonaco of creamy consistency. Finished applying plaster at 4:30:

Then he let the freshly plastered panel sit for a half hour:

Thickness of all the plaster coats (the crack is between the scratch coat and the brown coat):

From 5:00 to 5:30, Francisco applied a second coat of intonaco plaster:

Then he waited 2 hours, until the surface was matte, before painting. Strange, the plaster attracted flies:

Painting ideas in early drawing:

First drawing:

Final drawing:

Tracing paper over final drawing:

Once the drawing was traced, Francisco punched small holes in it with a pounce wheel:

The pounced drawing laid over the fresh plaster:

Francisco filled a sock with blue pigment, to make a pounce bag:

However it was easier to just spill a little pigment over the drawing, so that it would fall through the pounced holes:

Pigment spread over all the pounced tracing paper:

The drawing was successfully transfered to the plaster:
Good idea -- if the humidifier worked, it would have kept the air humid and retarded the drying:

Burlap soaked in water hung in front of the studio entrance, to keep the air humid:

Ground pigments ready for painting:

First phase -- started painting at 7:30 PM:


Second phase:


NOTE: At some point small cracks did appear in the surface. Francisco quickly cut those cracks out with an X-Acto knife, and replastered those small areas. Then he continued painting.
Final painting -- finished at 12:30 AM -- without cracks!

The fresco painting was covered in plastic to retard drying and prevent cracking. A box made of corrugated plastic made a "tent" over the fresco, to keep the darker plastic from touching the painting:

The fresco cracked two days later. We uncovered the fresco and looked at it 24 hours later, and saw no cracks. However, the air was very dry that night, which must have caused the painting to crack the next day:

Francisco cut the cracks out, and replastered them. He writes:
"I fixed the Fresco but I wasn't very happy with the result. When I filled the intonaco into the cracks the overfill made the other areas white and then when I painted the pigments they didn't exactly match. You can see the patches... Then I left it uncovered with the board on and it cracked some more. If I need to fix some parts I need to replace bigger chunks."

Detail of the head, where Francisco gouged out a crack in the yellow hair, and replastered it:

Chris welded a metal frame to support the heavy fresco:

Metal frame with reinforcements on the back:

Hi,
ReplyDeleteI enjoyed reading about your work - you will find if you thoroughly wet the first coat of plaster before adding the second coat, and keep the second coat to about 10 mil thick - morel ike a dime than a quarter - it won't crack.
The cracking is because the first coat, which has lime in it, is sucking the water straight out of the second coat, so that the second coat is surprised by this contraction, and cracks quickly. Even a humidifier won't stop this, because the process is going on between layer 1 and 2.
When layer 3 is put on, the thinner it is, the stronger it's going to be. I once submerged a panel with layer 2 already on it, in water which it soaked up. When i put layer 3 (intonaco) on it, layer 3 stayed moist for 36 hours! a great benefit when painting. this is because it slowly drew the water from layer 2 and carbonated as the water left layer 3 into the air.
Nice painting, very bold!
oh, i forgot to mention another thing you can do. you can get a primer paint (mike wye in the UK makes one, and i think it's called DG27), which has grit built into it, and paint right on a piece of wood.
ReplyDeletelet it dry a few hours, then soak it with distilled water, and put the intonaco right onto it!
I painted one board like this, 80 x 60 cm, and left it outside the whole summer and autumn, and that intonaco did not crack. so it's great to practice on.
the intonaco i make is lime putty 5 and marble dust 8. but get the marble dust to resemble sand in micron size: 120 - 800 microns. or you can use sharp sand, and get a violent colour when the lime putty is mixed. no water needed - the lime has plenty of water in it already.
all the best